![]()

200TDi into Defender - some useful information
Guide for DIY fitting - by Glencoyne Engineering
![]()
![]()
![]()
![]()
![]()
![]()
![]()
![]()
![]()
Plumbing and wiring
Your engine is now firmly bolted to the vehicle and now you "just" have to connect it all up. Be patient, there is still plenty to think about. I will try to cover the main problem areas, but there is a huge amount of variety in older Defenders and your vehicle may throw up a problem that I haven't dealt with here. If so, let me know and I will add the information to this page.
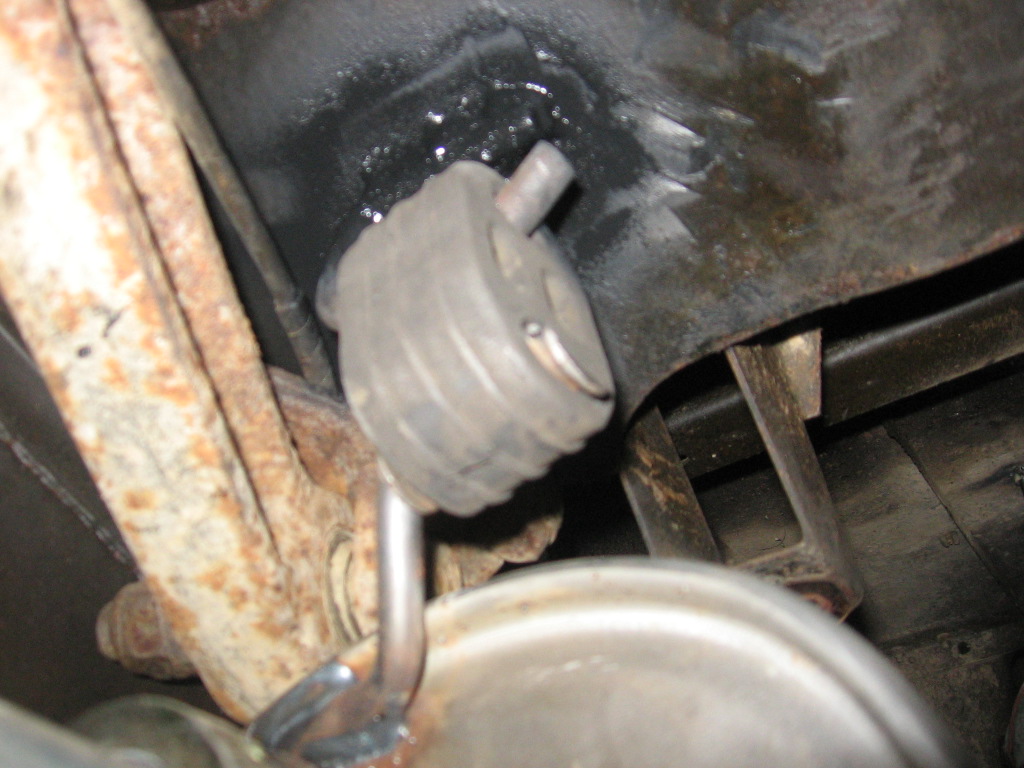
Fuel system
Nice and easy, so we'll do this first. Fuel filter - ideally you want to use the Disco filter housing with a new filter (AEU2147L). If converting an older diesel Defender you can use the old type filter, but you will need to blank off the unused ports. The Disco filter only has two - in and out (marked with arrows for direction of flow). I don't much like the old style filter - fiddly and prone to leaks. So I will assume that you are going to use the Disco filter.
Mounting the filter - easy on diesels, just bolt in place of the old filter using M8 bolts and large washers. Petrols do not have the threaded holes on the bulkhead, so you will need to fit M8 rivnuts. The filter fits approximately where the ignition coil previously sat. You might get away with large self-tapping bolts instead of rivnuts but the metal on that part of the bulkhead is fairly thin.
Fuel system plumbing is very simple. Fuel tank > lift pump > filter > injection pump > return line to tank. Working through from the beginning: if replacing a 2.5 diesel with the same type lift pump as the TDi, simply connect the feed line from the tank to the taller of the two unions on the pump. If your diesel had the older style AC pump the fuel line will not reach and you will have to extend it (8mm ID fuel pipe and Jubilee clips). Note that the two pump types are not interchangeable as the actuating arms are different lengths.
For petrol vehicles there is a bit more work to do. These have an electric pump - either bolted to the chassis or (on later vehicles) inside the tank. They also have a small bowl-type fuel filter - position varies depending on model, but it will be there somewhere. On earlier vehicles, the simplest solution is to remove the pump, filter and mounting plate altogether and run a new fuel line (8mm hose again) direct from the tank to the lift pump. On later vehicles remove the pump assembly from the tank, detach and remove the pump and then extend the pickup pipe so that it reaches to about 10mm above the bottom of the tank. Refit the assembly to the tank and run a new fuel line to the lift pump as before. Note that you will need the union and pipe which attaches to the lift pump - make sure you get these off the donor vehicle - cut through the plastic pipe just below the end of the metal section, leaving the pipe and union attached to the lift pump.
Lift pump to filter - the Disco has an S shaped plastic pipe. Cut this and extend it - 8mm hose and clips again. You should not be able to crush the plastic pipe unless you really overtighten the clips - it is quite a strong rigid pipe.
Filter to injection pump - 8mm hose will fit straight onto the outlet union on the filter and the inlet pipe on the injection pump. The inlet pipe is at the front of the pump. The pipe at the back is the return.
Return pipe - all Defenders including petrols have a return pipe to the tank. Connect this to the return outlet on the injection pump with yet more 8mm pipe.
Throttle cable - diesels already have a suitable cable. Petrols will need the cable replacing (ANR1419). You also need to remove and discard the choke cable.
Electrics
If you followed the advice on the last page your wiring loom will already be fitted to the engine and simply plugs in at the bulkhead. A few more things to think about:
Temperature sender - the Disco sender will not work with the Defender gauge. Late 2.5 diesels have a fine thread sender which is a direct swap. Petrols have a coarse thread sender which screws into an adapter. The adapter will fit straight into the 200TDi thermostat housing. Otherwise you will need a new fine thread sender PRC6663. Be very careful fitting the new sender - the threads in the housing are often corroded and it is very easy to cross thread the sender and destroy the thread in the housing. New housings are expensive. A few Disco engines had a coarse-threaded sender for which you can use a Defender 11L sender.
Battery cables - the diesel cables are fine to use with the 200TDi. Petrols have thinner battery cables - these work OK (200TDis usually fire up very easily) but for cold weather use you may want to replace them with something heavier.
Earth wire - you will need a reasonably heavy duty cable or strap between the engine block and the chassis. The earth wire on older Defenders is not really up to the job and often breaks. Earth straps are readily available from motor factors, Halfords etc.
Heater plugs - if converting a diesel you can keep the key-operated heater plug system. 200 TDis will usually fire up with no preheat unless the temperature is well below zero. For petrols you will need to provide power to the heater plugs and the best way is to use the Disco heater plug relay and wiring. This connects up as follows:
Thick brown cable - to battery terminal on starter solenoid
Thick yellow/black cable - to heater plugs
White wire - to switched feed (piggy back terminal off the stop solenoid on the injection pump)
Red/white wire - splice into red/white wire which goes to the starter solenoid
This leaves two wires - black, and either black/yellow or white/brown. The 2.5 petrol has a switch strapped to the choke cable with two wires attached - black and black/yellow. This is for the choke warning light. Remove the switch and connect the two wires to your two remaining heater plug relay wires (black to black). Now when you switch on the ignition the choke warning light should come on, and go out after a few seconds. You will also here the relay click on when you turn on the ignition, then click off about 5-10 seconds after the warning light goes out.
Power steering pipes
High pressure pipe (pump to steering box) - you cannot reuse the Defender pipe as the union at the pump is different. There is no off the shelf pipe that will fit as far as I am aware. The closest you will get is a Discovery pipe (NTC5494) but this is too short. There is a 30 degree bend in the steel pipe close to where it meets the rubber hose. You need to straighten this, then put a similar bend in the pipe about 100mm further along. This will allow the pipe to reach the pump. The pipe is quite thick, difficult to bend and easy to crack, so you will need to heat it with a blowtorch and bend it very carefully, a bit at a time.
Note that the above only applies to the most common 4-bolt or 6-bolt steering boxes. A few Defenders have acquired three bolt boxes from old Range Rovers which have different pipe unions. In this case you may have to go to a hydraulic hose specialist and see if you can get the flexible end from a Disco pipe crimped onto your old rigid pipe. Or you can try using an 8mm steel compression joint to connect the two pipes together.
Feed pipe (reservoir to pump) - replace with a length of 16mm ID rubber hose suitable for use with power steering fluid. A hydraulic hose specialist will have something suitable.
Make sure the pipework is properly secured. You may be able to use the old pipe clamps - otherwise use metal P clips for the high pressure pipe, and plastic or rubber lined P clips (or cable ties) for the feed pipe.
Vehicles without power steering
If your vehicle does not have power steering you have a problem, as the alternator on the Disco engine is driven off the power steering pump pulley. Two choices: either convert to power steering (outside the scope of this article, but not too difficult) or use one of my spacer kits (available through my web shop). This allows you to use the alternator mounting bracket off your old engine and puts the alternator pulley in line with the crank and water pump pulleys.
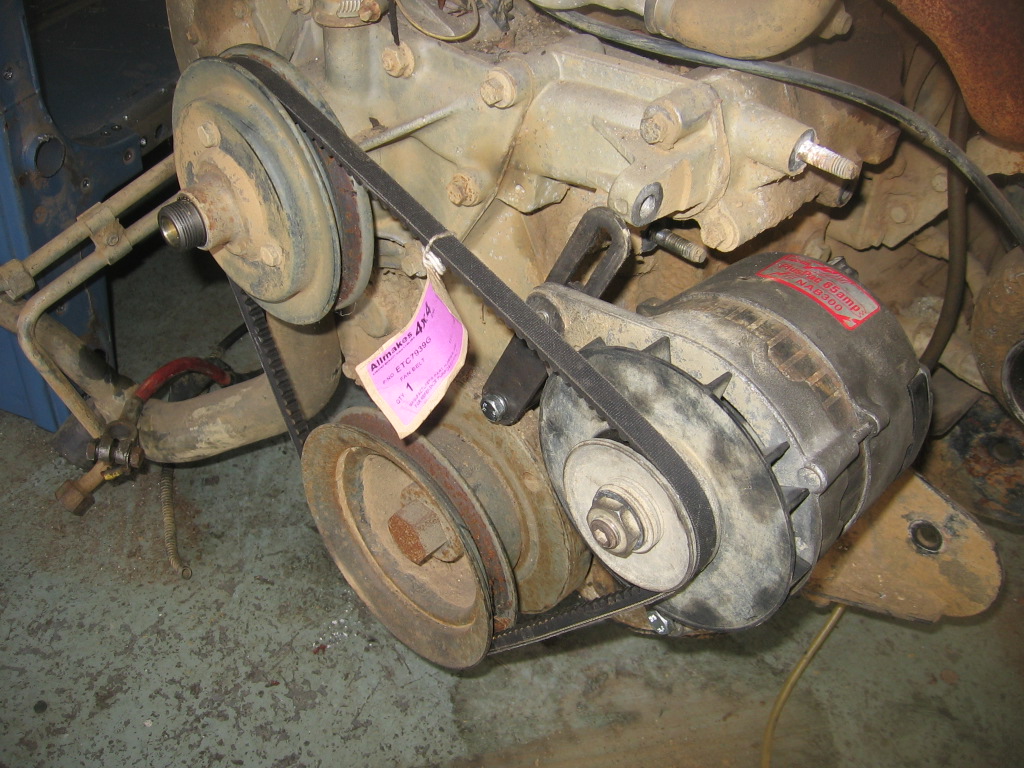
Alternator in place using Glencoyne spacer kit.
Radiator and intercooler
The Disco 200TDi uses the same radiator and intercooler as the Defender, but the frame is different. There is a small bracket on each end which needs to be cut off so that the frame will fit between the inner wings. The other difference is that the locating pins on the bottom are mounted on brackets, so if you fit the frame 'as is' the top edge will sit too high and foul the bonnet. If you can get hold of some Defender 200TDi radiator brackets (ESR282, ESR283, plus two mounting rubbers NRC5554) you can simply cut off the lower brackets and reweld flush with the frame. This will drop the radiator about 15mm. You will have to cut back the old offside mounting bracket so that you still have somewhere to put the bonnet prop.
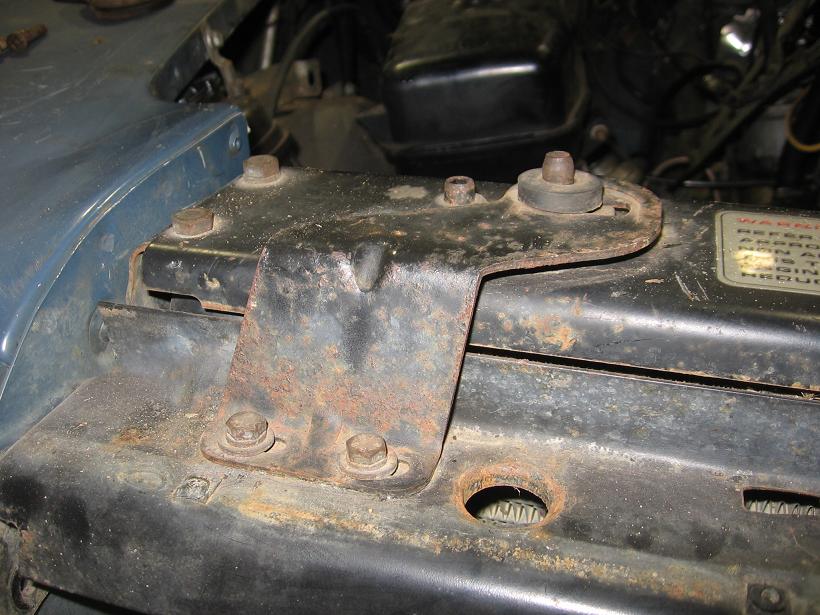
Defender 200TDi radiator top bracket
Alternatively you can take a slice out of the brackets on the chassis. This will allow you to drop the radiator another 10mm which gives you a bit more room when using the old style radiator brackets. Either way you will then need to position and mark the brackets and weld 10mm diameter pins to the top of the radiator frame. You may need to take a bit of metal out of the old style brackets to clear the rad/intercooler mounting pins and the bolts which hold the frame top to the sides.
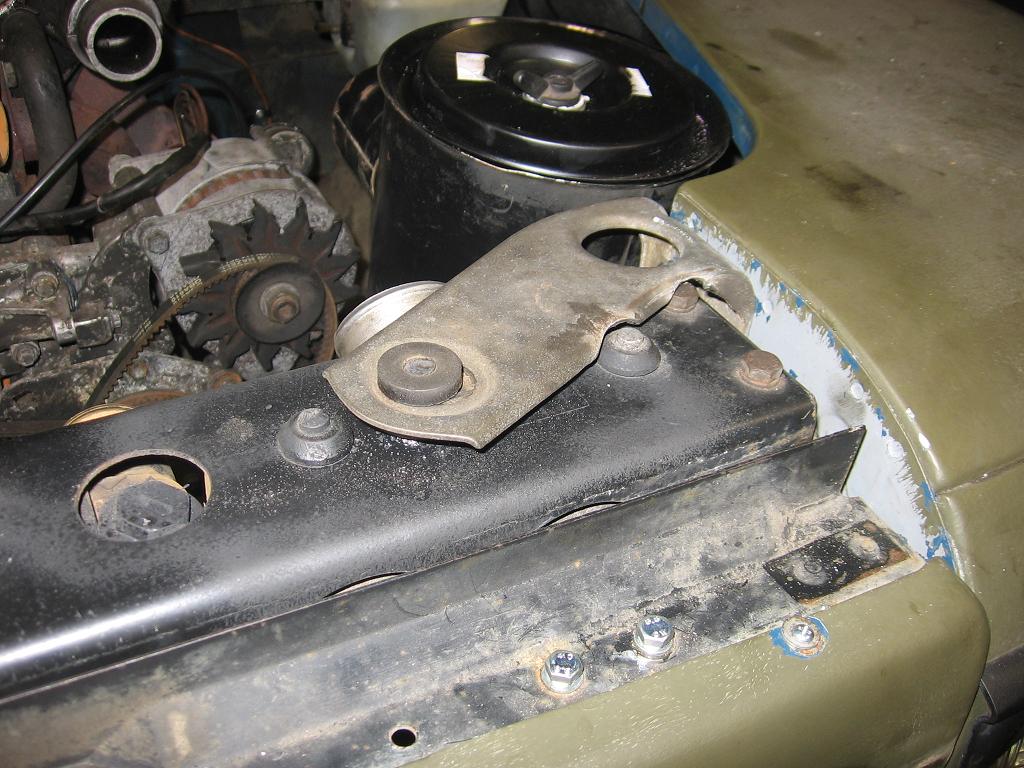
Old style radiator mount modified to fit TDi radiator
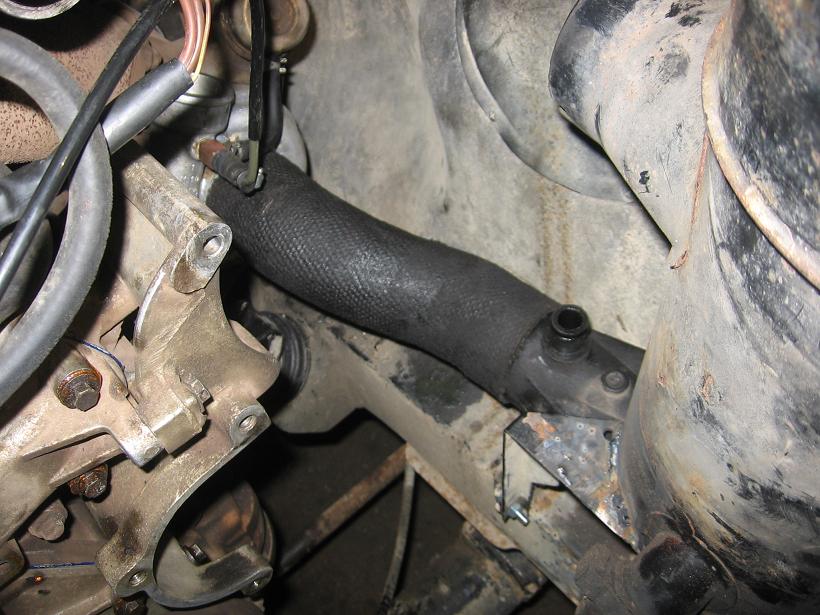
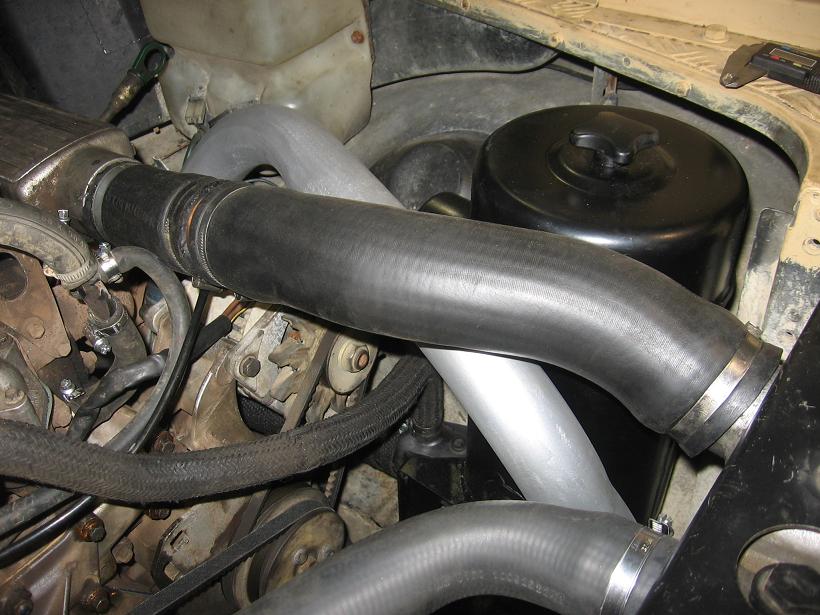
Cooling system hoses
Radiator top hose - use a Defender 200TDi hose NTC4895. If fitted in the 'normal' position this tends to get in the way of the top intercooler hose. So remove the thermostat housing, rotate 120 degrees clockwise and refit. Now the hose will fit (you may have to shorten it at the engine end) and will be well clear of any other pipework.
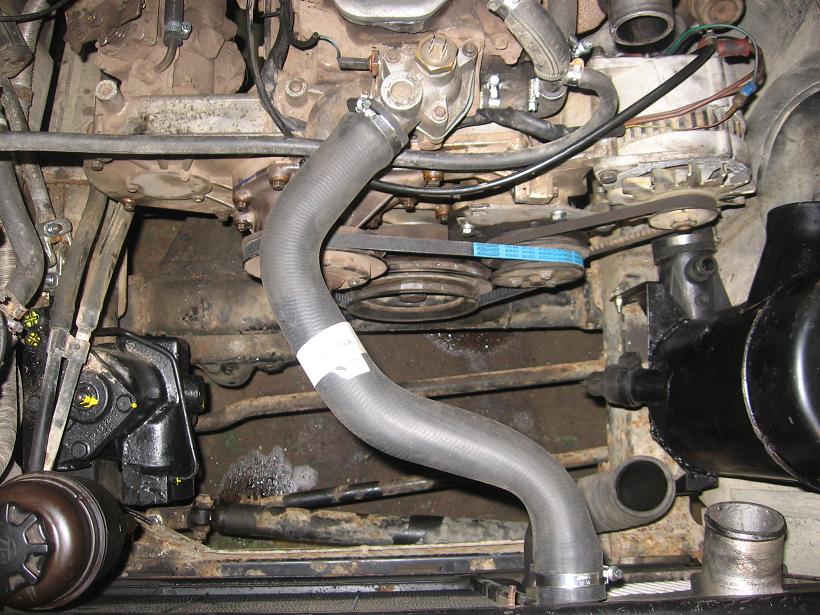
Top hose in place with repositioned thermostat housing
Bottom hose - use the Disco hose, cut and extended with a length of 38mm OD steel pipe around 220mm long. Make sure the hose does not rub on the steering box and is not kinked. You will also have to extend the pipe to the header tank - 15mm copper plumbing pipe works well here. Most vehicles have a 15mm pipe stub on the bottom of the reservoir but some early ones are 22mm. Again a plumbing supplier will help, with a 22-15mm reducer fitting which can be adapted to suit.
Heater hoses - easiest solution is to use off the shelf Defender hoses. If the pipe stubs on your heater face sideways use BTR1130 and BTR1132, for most older vehicles the stubs face downwards, in which case use BTR445 and BTR447. Or else you can adapt the Disco heater hoses. One is S shaped and needs cutting and extending (15mm plumbing pipe again). This connects to the vertical pipe stub near the back of the head. The other just needs a short amount cutting off one end and will then connect to the horizontal pipe which runs along the top of the head.
Oil cooler pipes
The engine in a Disco is much closer to the radiator than in a Defender, so the Disco oil cooler pipes will be too short. You have several options:
1. If converting a 2.5TD or late military 2.5NA with oil cooler built into the radiator you already have a suitable set of pipes. Around the end of 1992 Land Rover changed the design of oil cooler pipe union on the Discovery. Older engines have round-ended oil cooler pipes, the same as the 2.5TD. Later engines have pipes with a flanged end and O ring. If you want to use 2.5TD pipes on a later engine you will need to swap over the oil filter housing for the 2.5TD one, and swap the adapters on the oil cooler for the ones on your old oil cooler (taper thread, very tight and hard to shift).
2. You can extend the existing oil cooler pipes either with 1/2" steel pipe and compression fittings, or by taking them to a hydraulic hose specialist and asking them to replace the rubber hoses with longer ones. The pipes need extending around 160mm.
3. Buy new Defender oil cooler pipes. Part number for the older type unions is ESR280/ESR281, for the later type ESR1912/ESR1913.
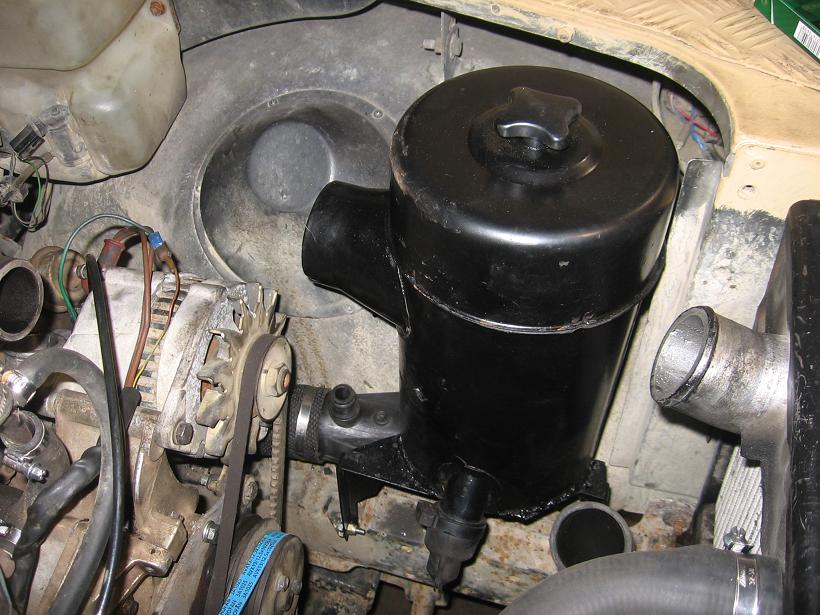
Air cleaner
One of the most awkward bits to get right. I tried various installations in the early days, then I saw a really nice simple solution on a customer vehicle and copied it. It uses the Disco filter housing mounted vertically in the front corner of the engine bay, behind the intercooler. You can either make up mounting brackets or adapt the bracket from your old air cleaner. You then use the elbow and semi-rigid intake hose (slightly shortened) from the Disco to connect to the turbo intake, and the breather hose from the cyclonic breather (on the side of the rocker cover) connects straight to the stub pipe on the elbow. Easier to show in pictures than words.
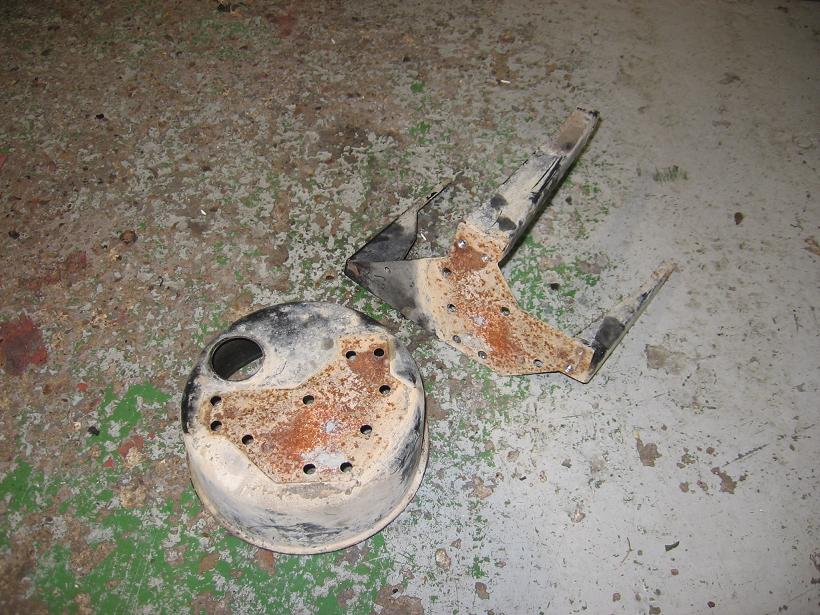
Stage 1 - drill out the spot welds and separate the two halves of the air cleaner base. Discard the round bit.
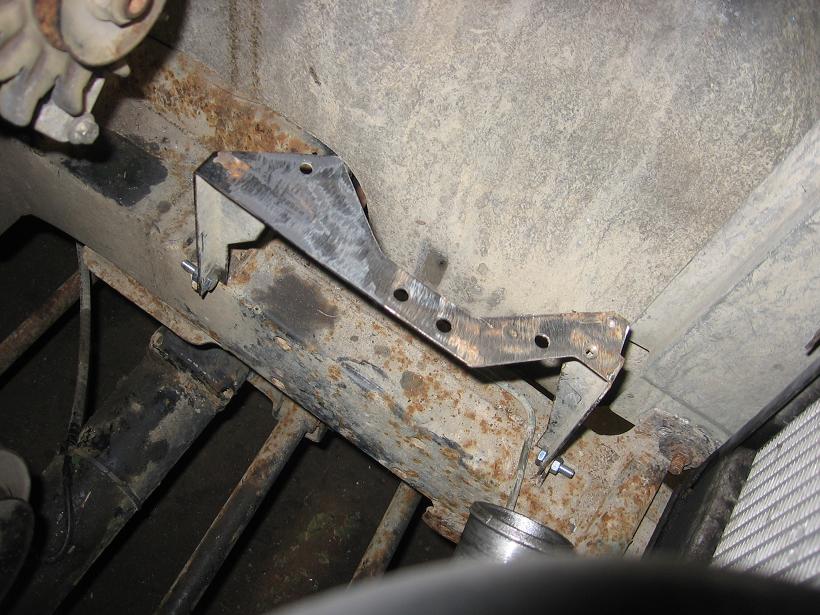
Stage 2 - cut back the bracket to clear the outlet on the bottom of the Disco air cleaner, then temorarily bolt the bracket to the chassis
Stage 3 - Position the air cleaner, then put in a couple of tack welds to hold it to the bracket. Remove the assembly and complete the welding
Stage 4 - semi-rigid pipe from the Disco slightly shortened and connected to the air cleaner using the plastic elbow that comes with it.
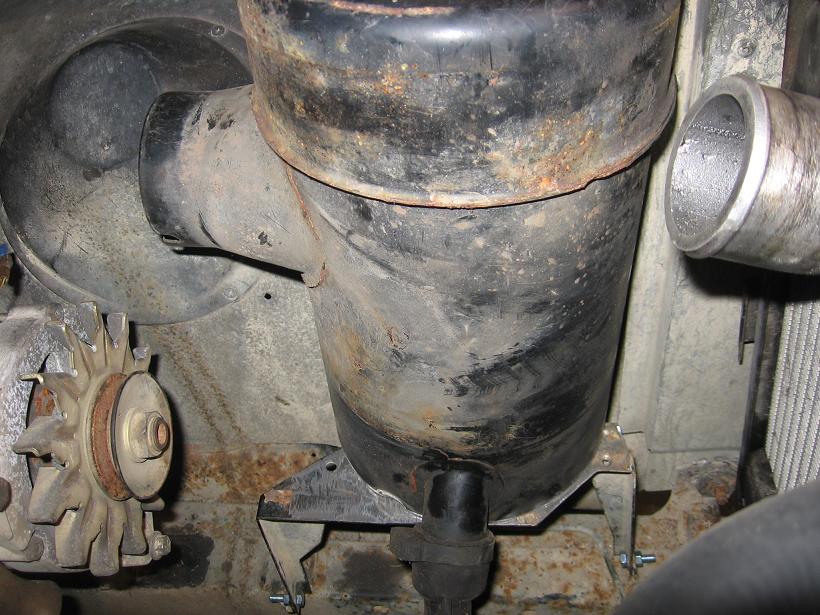
Stage 5 - completed assembly in place. Use an M6 bolt to attach the cleaner body to the inner wing and stop it from moving around.
There are two types of Disco air cleaner - the early type (above) with a removable end cover and the later one where the end cover is part of the filter. You may find (depending on the type of air cleaner) that the clearance between the inlet and the alternator is very tight. In which case you will need to extend the rearmost leg on the bracket around 20mm to tip the air cleaner forwards slightly, and you may also need to trim back the lip on the inner wing just in front of the air cleaner.
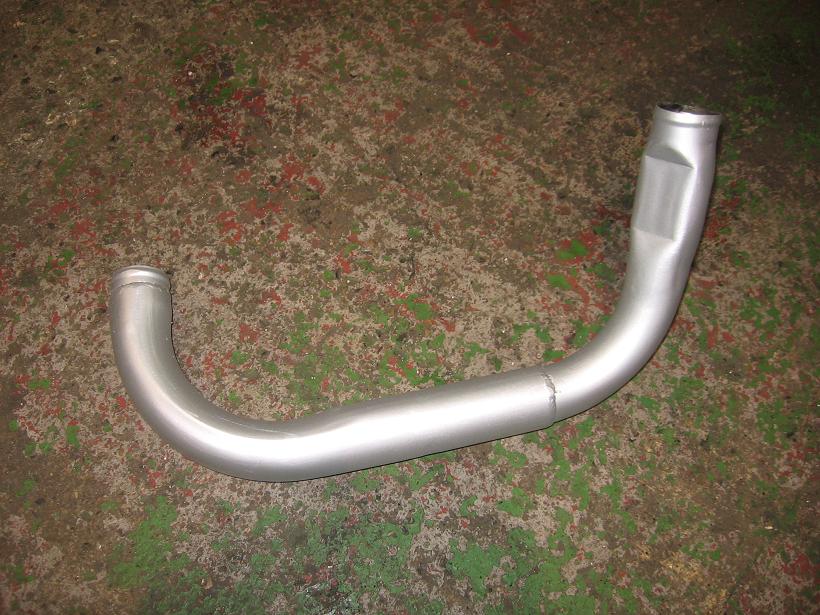
Intercooler pipes
Assuming you have followed my advice and 'clocked' the turbo: take the metal intercooler pipe from the Disco and extend it with a right angled piece of steel pipe of appropriate diameter. A 2.5 diesel downpipe is exactly right - the Disco pipe fits snugly inside it and then you just weld round the join. Use the silicone hoses from the Disco - straight pipe at the turbo end, right angle at the intercooler. See photos below. The Disco top hose can be extended using a length of straight steel pipe from the same source.
Exhaust system (updated 16/10/12)
If you are converting a 2.5TD your existing exhaust will work with the 200TDi, although slightly smaller in diameter than a 200TDi system. For all other conversions your old exhaust will be too restrictive and needs changing. For a 110 one option is a 2.5TD exhaust system which should fit onto the existing mountings. But what I would recommend, for either a Ninety or One Ten, is the exhaust centre and rear sections from a 300TDi, with a shortened Defender 200TDi front pipe married to a Steve Parker downpipe adapter. For the Ninety the best system to use is the late 'export spec' one as this does not need the mounting bracket on the drivers side chassis rail, which early Nineties do not have. The big advantage of the 300 systems is that the exhaust hangers are nice and simple - you can either make them, or buy them from YRM Metal Solutions (a lot cheaper than the original Land Rover parts).
Exhaust system part numbers:
Front pipe (200TDi) ESR158
Ninety centre and rear sections ESR4526, ESR4527
One Ten centre and rear sections ESR2383, ESR2384
You will also need three mounting rubbers (ESR3172)
When I get round to writing up my 300TDi conversion I will go into this in more detail - for now, here are a few pictures showing how I fitted an export spec 300TDi exhaust to a 1985 Ninety.
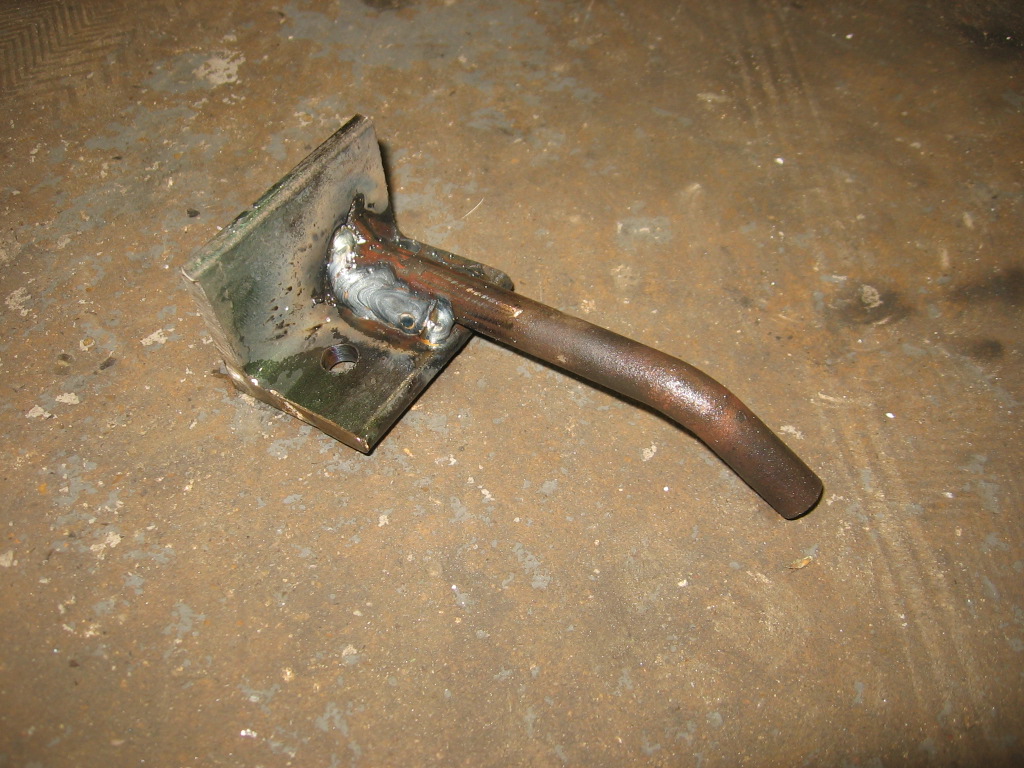
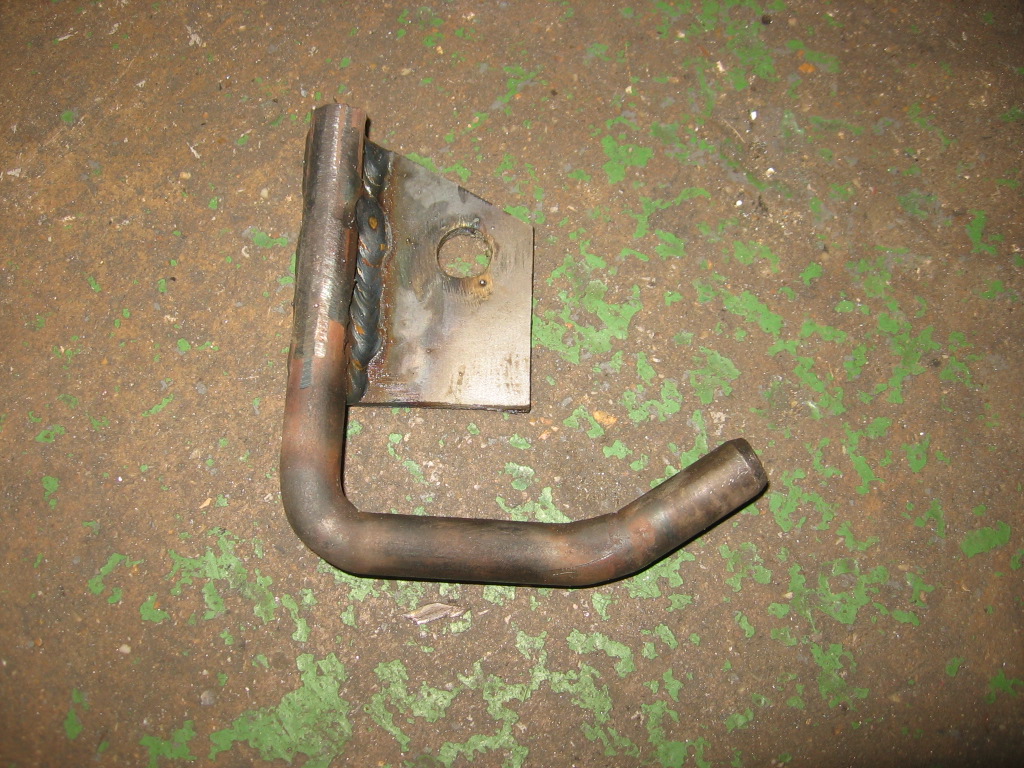
Rear mounting bracket - 10mm steel bar bent and welded to a piece of steel angle.
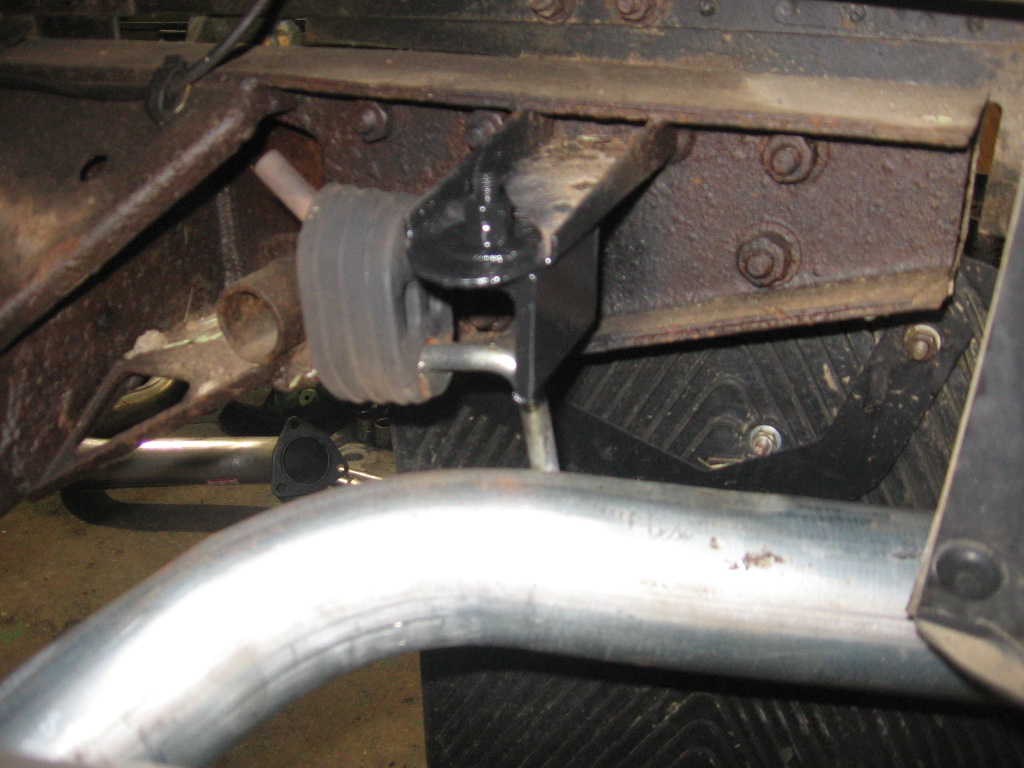
Rear bracket in place. The One Ten system uses the same mounting point here.
Front bracket - bolts to the back of the transfer box using one of the cover plate bolts.
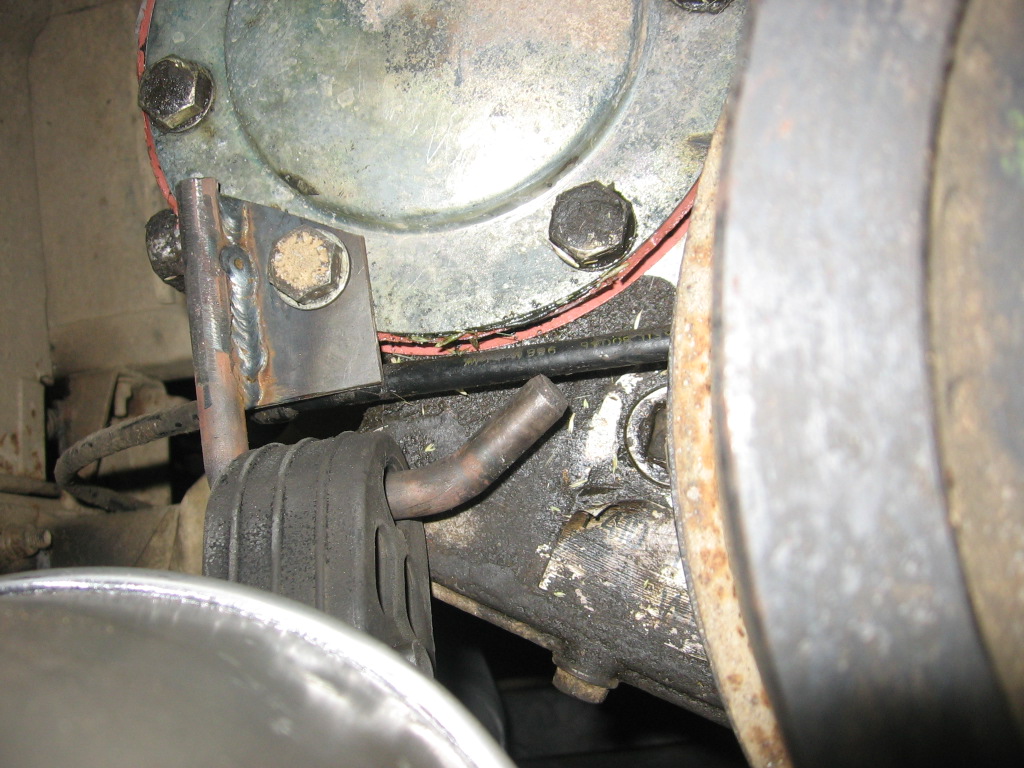
Front bracket in position
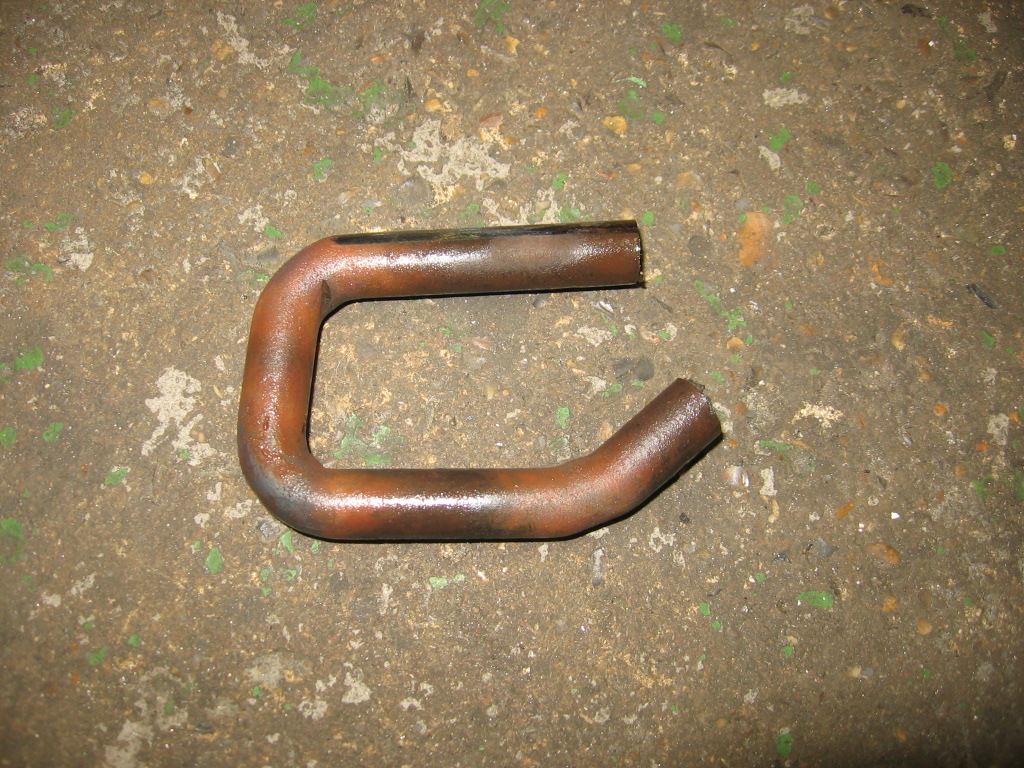
Centre bracket - welded to underside of crossmember. The One Ten uses the same bracket as the rear one, bolted to the existing exhaust mounting bracket on the chassis.
Centre bracket in position
Cooling fan
The Disco viscous fan sits a long way back from the radiator and without a fan shroud it will just stir up the air in the engine bay rather than drawing it through the radiator. It also tends to catch on the radiator hoses. It is possible (with a lot of hacking about and swearing) to turn a late 2.5 shroud upside-down and adapt it to fit, but an electric fan is a lot less work. An 11 inch fan is plenty big enough for normal duty. If your donor Disco has air conditioning you will find some more useful bits on it - two 11 inch fans on the front of the heat exchanger, and a thermostat housing with a 94 degree thermostatic switch built in. All you then need is a relay, in line fuse and some wire. Failing this a cooling fan kit from Kenlowe, Pacet etc will do the job.
At this point you should be about ready to go. Fresh oil, coolant and power steering fluid, bleed the fuel system at the filter, connect up the battery and turn the key. On petrol vehicles, don't forget to drain the fuel tank and put some diesel in it...
Next - questions and problems - click here