![]()

Timing belt
changes - some useful tips![]()
![]()
![]()
![]()
![]()
![]()
![]()
![]()
![]()
Toothed rubber timing belts were used on many Land Rovers through the 1980s and 90s, including Defender (2.5 diesel and turbodiesel, 200 and 300TDi), Discovery and Range Rover (200 and 300TDi). The belts are pretty sturdy and designed for a long life - change interval is either 60K or 72K depending on model. However they will eventually break if not changed, and this will do a lot of damage to the engine. So belt changes are not something you can just ignore. With garages charging anywhere from 150 to 400 or even more for a belt change, it is possible to save a fair bit of money by doing it yourself, but the procedure isn't always as straightforward as the workshop manual suggests. This page is not intended to replace the workshop manual instructions, but to provide a bit of additional information which will help you do the job right first time.
It goes without saying that the job should be done properly. Just replacing the belt and not the tensioner and idler is a false economy: the roller bearings are designed to last 60,000 miles, not 120,000. Leaking oil seals on the crankshaft or camshaft will soak the belt in oil and reduce its life. And if the belt tension is set incorrectly, the belt will have a short life and other components such as the injection pump may be damaged as well. Having said which, changing the timing belt on these engines is a lot easier than on many cars, and well within the capabilities of any competent DIY mechanic. I sell comprehensive timing belt kits through my web shop which will provide you with all the seals, gaskets, O rings etc that you need to do the job properly.
Crank pulley bolt
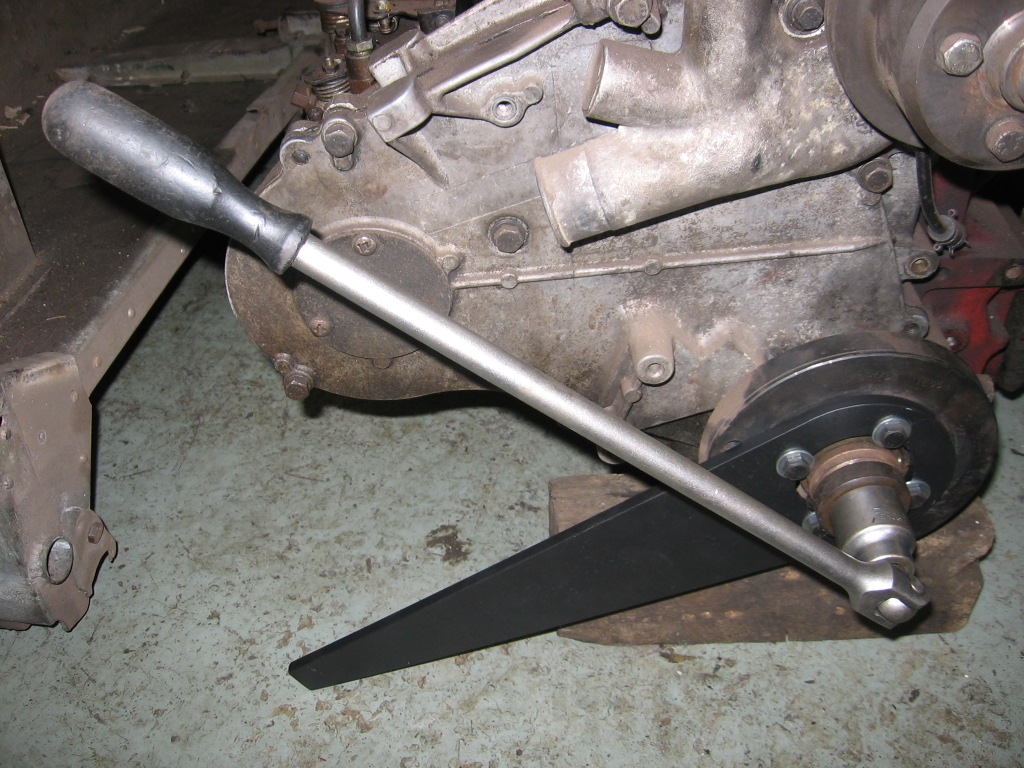
The first problem you are likely to encounter is removing the bolt which secures the front pulley / vibration damper assembly to the crankshaft. This is done up very tight (up to 250 lb ft depending on engine type) and secured with thread locking adhesive. There is a good reason for this: if the pulley works loose it will damage the nose of the crankshaft and eventually shear the key that locks the lower timing belt pulley to the crank. You will need a long breaker bar (3/4" drive is best, but a good quality 1/2" drive bar should be sufficient) and the appropriate socket (41mm for early pre-TDi engines, 30mm for later pre-TDi and 200TDi, 27mm for 300TDi). It is sometimes possible to loosen the bolt by putting the vehicle in gear and getting an assistant to stand on the brakes while you heave on the breaker bar (normal thread on the bolt by the way - anticlockwise to loosen). However, a much better way is to use a crank locking tool.
Depending on the crank pulley type you may need one of three different locking tools. Early pre-TDi engines have the crank pulley and vibration damper cast as one unit: these require Land Rover special tool LRT-12-043. Later pre-TDi engines and all 200TDis have a removable pulley secured to the vibration damper with four M8 bolts. A locking tool for these can be made up from a piece of strong angle steel with two holes drilled in it. I used to sell the tool pictured below but no longer do these - similar tools are available on eBay. The 300TDi reverted to a one-piece pulley and damper, and this requires special tool LRT-12-080 - again, an equivalent is available on eBay.
Crank locking tool in use
You will then need to draw the damper off the nose of the crank. Sometimes they slide off with no problems, sometimes they are a bit tight. A harmonic balancer puller will normally shift it, unless it is damaged - Silverline do one for under a tenner (product # 580487). Sometimes you will find that the damper has been Loctited to the crank - use a blowtorch to heat the joint and break down the adhesive, but be careful not to apply too much heat to the balancer as it contains a bonded rubber element.
Timing cover
Having removed the front crank pulley, in theory you just have do undo the bolts securing the timing cover, then pop the cover off to access the belt. Ha ha ha.
The cover is secured with a mixture of short bolts and long through bolts which pass through the timing case and into the block. These long bolts have a nasty habit of rusting and seizing in the timing case, and they aren't very strong. So it is easy to shear one off, and then you are in some trouble. The ones most likely to give problems are those nearest the water pump, as coolant seeps past the gasket and finds its way into the bolt holes. Just to make life even more amusing, later engines use bolts with a shouldered 10mm hex head, which is very easy to round off. Make sure you use a good quality, close fitting six-point socket, not the more common bi-hex (twelve-point) one.
The best way to shift these bolts is with an impact gun - either air driven or cordless. This helps shock the bolts free, and is less likely to twist them off than a hand-operated ratchet. If you find one which will not shift, heat the casting around it with a blowtorch and try again. You can also try soaking the bolts in Plus Gas or similar. If you do break a bolt close to the head, you may be able to weld a nut onto the end and get it out that way, but in most cases you will end up having to remove the whole timing case. This is not especially difficult but it is a job you could do without.
Having removed (or sheared) the bolts, you should be able to tap the cover free. It is held on with two steel dowels and tends to be quite tight. Be very careful levering it away from the timing case as it is a thin aluminium casting and you don't want to break it.
Oil seals
Once you have removed the front pulley assembly and timing cover, you will need a couple more tools if you plan to replace the crankshaft and/or camshaft oil seals. The crankshaft seal really should be changed every time you change the belt. The camshaft seal tends to be longer lived as it runs at only half crank speed, but should be changed if there is any sign of oil seepage. You will need a seal remover (the simple hook type) to pull the seals, something to tap the new seals into place squarely without damage (piece of steel tube will do the job), and some means of removing the crank and cam gear wheels to access the seals. The cam gear wheel can easily be dealt with using the harmonic balancer puller mentioned earlier. For the crank gear wheel you will need a puller and a set of M5 shoulder pins. It is sometimes possible to gently lever the pulley off the crank using a thin bladed screwdriver, but be very careful not to damage the casing around the oil seal recess. As with the crank pulley, the gear wheel is sometimes Loctited in place and may need heating. Don't be too brutal with the puller, as the threaded holes for the pins are only M5, and if you snap a pin in the gear wheel you will be in worse trouble. In extreme cases people have been known to resort to cutting the gear wheel off with an angle grinder.
Reassembly
Putting it all back together is pretty straightforward as long as you follow the instructions in the manual. In particular, ensure you set everything up using the timing marks. Some people just mark the pulleys with paint rather than using the marks - bad idea, as the cam pulley might be one tooth out from a previous belt change. If you just put the new belt on without checking the timing marks, your new belt will also be one tooth out, and your engine will run but not quite as well as it should. You will need a simple torsion bar type torque gauge to set the belt tension - a micrometer 'click' type torque wrench is no use for this job. Note that on 300TDi engines, Land Rover subsequently reduced the recommended torque on the belt tensioner from 15Nm to 11Nm - earlier workshop manuals may not incorporate this change.
To set the timing on 200 and 300TDi engines, the manual recommends a special timing pin which screws into the bottom of the flywheel housing. You will find that the reverse light switch from an R380 gearbox does exactly the same job, and has the advantage of being spring loaded - just screw it in, then slowly turn the crank until it locks. Part number AMR3918, widely available for under a tenner. This will work for all 200TDi engines, and all 300s (including automatics) except the very late 'fly-by-wire' ones.
On older pre-TDi engines, be warned: some of them are missing the slot in the flywheel that is supposed to engage with the locking pin to lock the crank at TDC. There is another slot in the flywheel, and if you mistake this for the TDC mark your timing will be about a hundred degrees out. So go by the marks on the pulleys and timing case.
On the TDis the injection pump timing can be checked very easily using the crank locking tool mentioned above and a 9.5mm drill bit through the pump sprocket and into the slot in the pump body. The workshop manual will explain the procedure in detail. Pre-TDi engines are more difficult, as you need a special timing pin for the pump which is moderately expensive. My advice with the older engines is that if it was running fine before you did the belt change, the pump timing should not need playing with. Timing belts are Kevlar-backed and should not stretch in service, so with the new belt your pump timing should be the same as with the old one.
When refitting the timing cover, always use new gaskets and coat the bolts in copper anti-seize grease. Use a smear of Blue Hylomar around any water passages. The crank pulley bolt should have its thread smeared with thread-locking compound. It is done up very tight - up to 250 lb ft - and most 1/2" torque wrenches only read up to 150 lb ft. So either borrow or hire a big torque wrench, or do what most people do - tighten it really, really tight. You are unlikely to be able to do it up tight enough with hand tools to do it any damage.
300Tdi timing belt modifications
Around 1997, Land Rover dealers started to report that some 300Tdi engined Defenders, Discoveries and Range Rovers were suffering premature timing belt failure. The belt was rubbing against the flanged edge of the tensioner, getting worn away and eventually breaking long before the scheduled change interval. The cause was misalignment of the pulleys , tensioner and roller, due to a combination of an inadequately strong timing case, poorly designed injection pump bracket and incorrect assembly methods. Not all vehicles were affected, and no official recall program was ever put in place, but Land Rover issued a series of technical bulletins to dealers, changed the design of tensioner, idler and bottom pulley, and produced two modification kits for affected vehicles.
The first modification kit STC4095K, for earlier vehicles, included a new timing case, injection pump bracket and sundry other hardware. The second kit STC4096K was less comprehensive, comprising a new belt, later type tensioner, idler, lower pulley, bolts and studs. Dealers were instructed to paint a yellow square on the upper left end of the timing cover on vehicles which had been fitted with a modification kit. However, as not all vehicles were affected by the problem, not all were modified. This can lead to problems when trying to work out which components to order.
In theory, if your vehicle has a chassis number lower than VA117353 (Defender) or VA560897 (Discovery) it should have the early type tensioner and idler, with a flanged lip on the tensioner and no lip on the bottom pulley. However, if it has been modified, or if the chassis number is higher than those quoted above, it will need the later type tensioner and idler. The only way you can confirm for sure which type you need is to remove the timing cover and have a look. This isn’t quite as bad as it sounds since on a 300Tdi you don’t have to disturb the water pump to remove the cover, but you will need to remove the crankshaft vibration damper and belt pulley.
On removing the timing cover, if the edge of the belt is heavily shredded and the timing cover is full of something that looks like black candyfloss, then you have a problem. Land Rover advise that the modification kits should be fitted as follows:
-
Discovery to VA711273 (except VA542371-VA558898), Defender to VA101256, Range Rover Classic (all) require kit STC4095K.
-
Discovery VA542371-VA558898 and VA711274-WA748935, Defender VA101257-VA129096 require kit STC4096K.
Discovery from WA748936 and Defender from VA129097 should not require any modification.
In addition, when fitting kit STC4096K you will need to replace the front outer timing cover seal with part ERR7143, if your vehicle’s VIN number is in the following ranges:
-
Discovery VA548520-VA558898 and VA716897-WA748935, Defender VA107351-VA129096.
All of which is horribly complicated, but just remember, if your timing case isn’t full of black fluff, you don’t need to worry.
Click here for contact details.
Covering Norfolk, Suffolk, Cambridgeshire, Breckland, Fenland
Nearest Towns: Thetford, Brandon, Bury St Edmunds, Newmarket, Cambridge, Diss, Mildenhall, Lakenheath, Stowmarket
Servicing, repairs, restoration, MoT test preparation, mechanical overhaul, welding, rewiring, timing belt changes, clutch and gearbox replacement, brake system repairs, steering box replacement and much more